
Ceiling Imperfections After Popcorn Removal: What They Mean and How They’re Fixed
Updated August 30, 2026
A visual diagnostic guide to the defects popcorn texture can reveal, when spot repair works, and when a full skim coat produces the better smooth ceiling.
- Trusted since 2005
- Fully insured
- Dust-controlled sanding
- Paint-ready finishing
- 3-year workmanship warranty
Quick Answer
Scrape marks, torn drywall paper, visible seams, ridges, nail pops, old patches, and shallow waves are common discoveries after popcorn texture comes off. Small isolated defects can often be sealed and spot-repaired, but widespread variation usually needs a full-field skim coat, controlled sanding, primer, and inspection under the room’s real lighting. Paint should be the final step, not the test used to discover unfinished drywall.
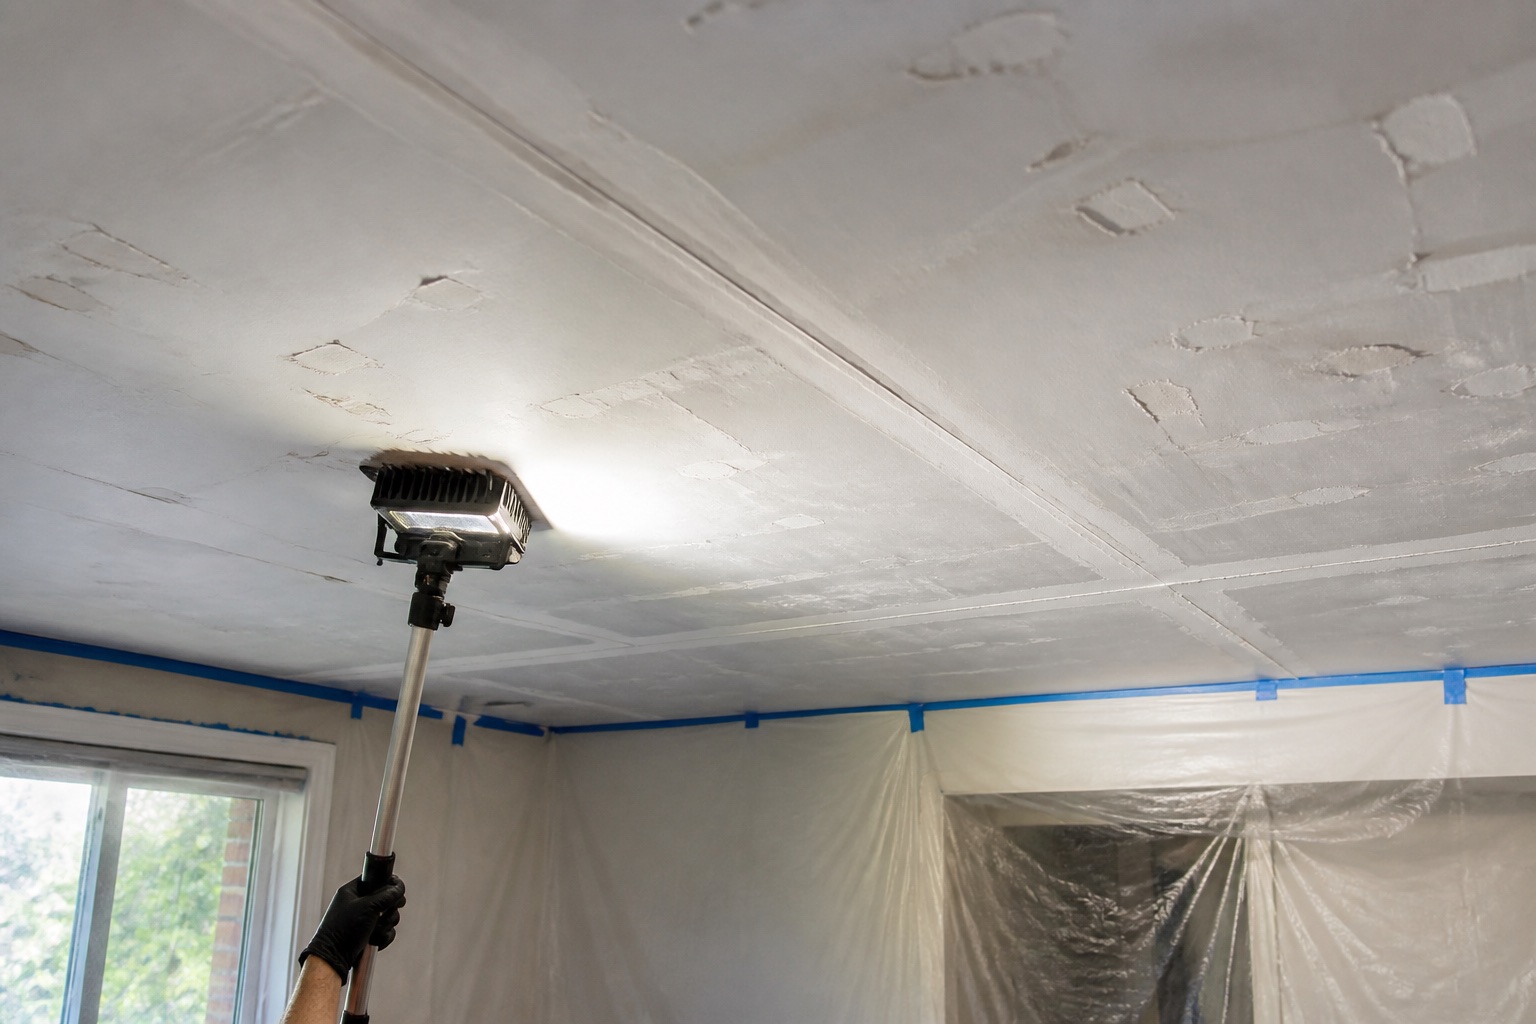
The ceiling visible after popcorn removal is usually not the ceiling homeowners expected to paint. Texture can hide builder-grade joints, uneven compound, old leak repairs, paper damage, fastener marks, and broad waves for decades. Removing it exposes the actual substrate. That does not automatically mean the removal failed; it means the finishing scope can finally be judged accurately.
EPF’s popcorn ceiling removal and smooth refinishing service treats scraping as an early stage. Repairs, skim coating, dust-controlled sanding, primer, and paint are what turn an exposed ceiling into a finished one.
Ceiling defect guide: identify the condition before choosing the fix
| Imperfection | What it usually is | Typical correction |
|---|---|---|
| Shallow scraper lines | Tool marks in residue or compound | Feathered fill or broader skim, then controlled sanding |
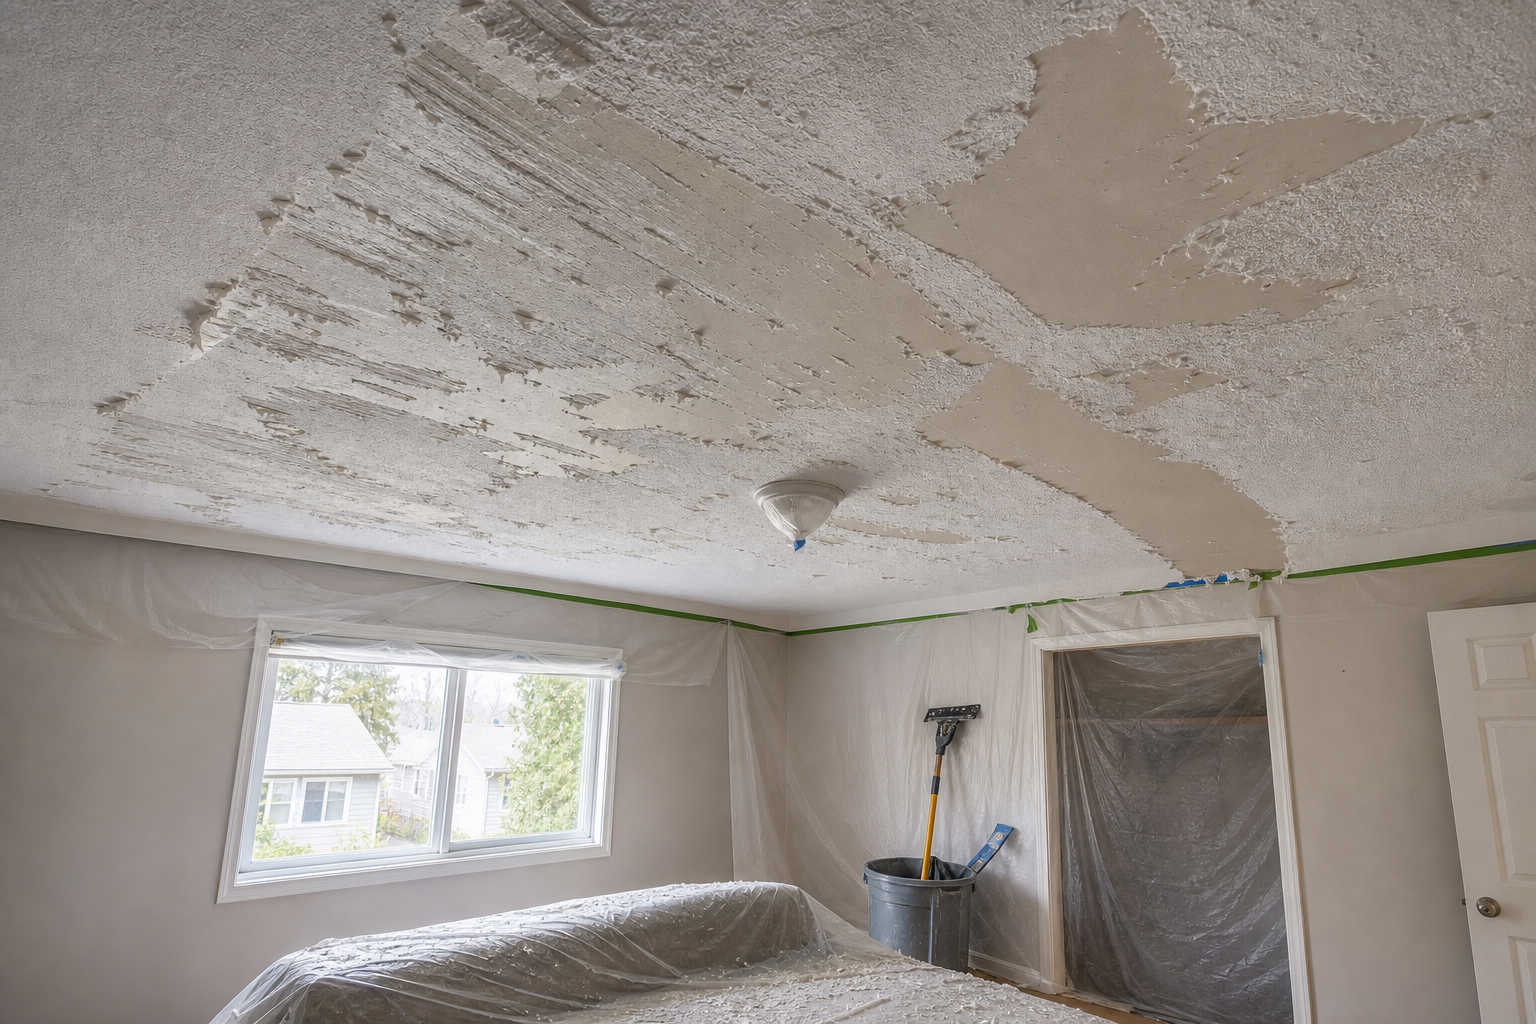
| Brown fuzzy paper | Drywall face paper torn during removal | Remove loose fibres, seal appropriately, then fill and feather |
| Long straight ridge | Board joint, tape buildup, or framing variation | Assess adhesion and plane; widen the correction instead of sanding through tape |
| Round dimples or bumps | Fasteners, nail pops, or old patches | Secure as required, repair locally, then blend into the field |
| Repeating broad waves | Original board or framing plane variation | Full-field levelling or a discussion about realistic finish tolerance |
| Dark patch after primer | Porosity, moisture, stain, or incomplete drying | Identify cause; correct and re-prime before paint |
Why popcorn ceilings hide more than texture
A textured finish breaks up light. Peaks and shadows make the eye less sensitive to the exact plane below. Builders could finish taped joints for texture rather than for a broad smooth surface. Repairs completed later could be hidden by another spray application. Once the texture is removed, daylight and fixture light travel across a much flatter-looking field and make every height difference easier to see.
The ceiling may also have changed over time. Framing dries and moves, fasteners loosen, tape ages, plumbing or electrical work leaves patches, and previous owners paint over stains. Removal does not create those conditions, although poor removal technique can add gouges or torn paper. A fair diagnosis separates existing substrate issues from new tool damage so the right correction is used.
Scrape marks and gouges
Light scraper tracks in remaining texture or old compound can disappear under a properly applied skim coat. Deep gouges need to be filled without leaving a proud mound. The temptation is to sand until every line disappears, but aggressive sanding can thin drywall paper, expose tape, and create a low area wider than the original mark. Filling low defects is often safer than grinding down the surrounding ceiling.
Gouges should be cleaned of loose edges and dust. Deep fills may need a material and sequence suited to the thickness, followed by wider finishing coats. Each coat must dry or set as designed. One heavy pass can shrink, crack, remain damp inside, or require excessive sanding.
Torn drywall paper and brown fuzzy areas
When the face paper tears, loose fibres can swell through water-based compound and create bubbles. The damaged area is trimmed back to material that remains bonded, dust is removed, and the exposed paper is sealed with an appropriate product before finishing. Applying ordinary compound directly over fuzzy torn paper can look flat initially and blister during the next wet coat.
The seal-and-repair area should extend only as far as necessary, but the final feather may need to be much wider. On a ceiling, a narrow raised patch casts a shadow. Several thin, broad transitions are usually easier to hide than a thick repair concentrated directly over the tear.
Visible drywall seams and tape lines
A straight line is often a board joint. It may be low, proud, under-filled, overbuilt, cracked, or affected by loose tape. Sanding a high-looking seam without identifying the layers can expose or damage the tape. If tape has released, it needs repair. If the seam is sound but visually proud, the surrounding field may need to be widened so the transition reads flatter under light.
Butt joints are especially demanding because there is no recessed factory edge to receive tape and compound. A good finish spreads the transition over a broad distance. Popcorn texture may have hidden a narrow original joint; a smooth ceiling cannot. The corrective goal is not geometrical perfection at one inch—it is a plane that looks uniform from normal viewing positions.
Nail pops, screw dimples, and small circular repairs
A bump or crater may mark a fastener. Simply covering a moving fastener can allow the defect to return. The board and framing relationship should be checked, and the area secured appropriately before compound is applied. Old circular patches may also mark previous electrical work, plumbing access, or fixture relocation. Their edges often need wider feathering than the patch diameter suggests.
Pot lights make these defects especially visible because the fixture sits beside the repair and throws light across it. Final fixture locations should therefore be settled before the last skim, primer, and paint. Cutting new openings after the ceiling is finished creates another round of dust, edge damage, and patch risk.
Waves, humps, and low board areas
Broad waves can come from framing variation, board installation, built-up joints, sagging, or earlier repairs. Joint compound can improve shallow visual variation, but it is not a structural levelling system for every condition. Deep sagging, ongoing movement, moisture damage, or unsupported board requires investigation rather than endless skim coats.
Raking light can exaggerate very small deviations, so expectations need to be tied to the room. A bright open ceiling with large side windows and rows of recessed lights is less forgiving than a small bedroom with diffuse light. The contractor should identify the worst sightlines and discuss what finish level is reasonable before work continues.
Old patches and texture islands
Previous repairs may be harder, smoother, higher, or more heavily painted than the surrounding ceiling. During removal, popcorn can release from one area and remain locked to another. The result looks like islands. Chasing every edge aggressively may damage the board. A controlled strategy can remove loose material, prepare stable areas, and bridge transitions with compound.
If several patches are scattered across the ceiling, spot finishing each one can create a field of halos. A full skim is often more efficient visually because it treats the whole plane consistently. This is a finish judgment rather than a rule: a nearly perfect ceiling with two small defects does not automatically need the same scope as a ceiling with repairs at every fixture and seam.
Stains, discolouration, and moisture clues
Brown, yellow, grey, or dark marks should not be buried automatically. Confirm whether the source is old or active and whether the board is dry and sound. Water can travel before appearing, so the visible stain may not sit directly below the source. Appropriate repair and stain-blocking primer come after source control.
For a stained or softened textured ceiling, use the dedicated water-damaged popcorn ceiling repair-or-removal guide before treating the problem as ordinary surface prep.
When spot repair is enough
Spot repair works when defects are few, shallow, stable, and separated; the surrounding field is already reasonably flat; and lighting is forgiving. Each defect is corrected for its cause, then feathered and inspected. Spot priming may be used as part of the system, but the full ceiling often benefits from a consistent primer and finish coat to avoid flashing.
A contractor should be able to mark the individual repairs and explain why the rest of the ceiling can remain untouched. If the repair list expands to every joint, every scraper pass, and every old patch, the work is no longer truly local. That is the point where full-field refinishing deserves comparison.
When a full skim coat is the better option
Full-field skim coating is useful when imperfections are widespread, when painted texture left irregular residue, when many repairs overlap, or when critical light makes local feathers obvious. Thin controlled coats unify paper, old compound, sealed repairs, and shallow variation. The aim is not to build a thick new ceiling; it is to create a continuous finish surface with controlled transitions.
Compound selection, mixing consistency, application direction, working time, temperature, humidity, and sanding all influence the result. Applying too much material creates more drying and sanding. Leaving hard edges between passes creates ridges. Sanding too aggressively digs lows and exposes paper. Skilled application reduces the amount of corrective sanding needed.
Read why scraping alone does not create a smooth ceiling for the broader removal-versus-finish distinction, and the Level 4 versus Level 5 drywall finish guide for finish expectations under demanding light.
The practical repair sequence after removal
First, loose texture and debris are removed under the correct safety plan. The ceiling is allowed to dry if wet methods were used. Adhesion, paper condition, joints, fasteners, cracks, stains, and plane variation are mapped before compound covers the evidence. Defects that need sealing, securing, retaping, or deeper fill are handled in the correct order.
Second, local repairs are brought near the surrounding plane. A full skim is applied when the field needs unifying. Successive coats are allowed to dry properly, then sanded with dust control. Corners, crown moulding, pot lights, vents, smoke alarms, fans, and ceiling transitions receive deliberate edge work instead of heavy caulk or paint buildup.
Third, the surface is cleaned and inspected under raking light. Primer is applied to equalize porosity and reveal what raw compound hides. Pinholes, scratches, ridges, and repair edges are touched up, sanded, and spot-primed. Only then is flat ceiling paint applied in a consistent system.
Why primer often reveals defects that seemed invisible
Raw joint compound is matte, porous, and visually forgiving. Paper, sealed repairs, and old paint absorb differently. Primer gives the surface a more consistent colour and reflection, which can expose tiny ridges and porosity changes. Finding those issues after primer is not necessarily failure; primer is a quality-control stage when the schedule includes time for corrections.
Using finish paint as the first inspection coat is less efficient. Touch-ups over paint can create another porosity difference, and unprimed compound can flash. The scope should include a realistic inspection-and-touch-up allowance rather than assuming one sanding pass makes every ceiling paint-ready.
Lighting is part of the finish specification
Inspect the ceiling with the window coverings as they are normally used and with the permanent lights operating. A work light held directly against the surface is valuable for finding tool marks, but it represents an extreme condition. Normal doorways, seating positions, window light, and fixture angles determine what occupants will see every day.
Rows of pot lights, large windows, skylights, and long open rooms create critical light. Flat paint reduces sheen but cannot flatten the substrate. In these rooms, broader skim coating and more deliberate inspection may provide better value than repeated local touch-ups after painting.
Common DIY corrections that make the ceiling harder to finish
Repeatedly sanding one high-looking seam can expose tape. Applying compound only inside a gouge can leave a visible ring. Coating torn paper without sealing it can blister. Painting before the field is uniform can lock in ridges and add flashing. Using caulk across cracks or seams creates a different texture and may not address movement. Heavy coats delay drying and shrink more than controlled passes.
A homeowner who has already scraped the ceiling can still improve the handoff. Stop before primer if the surface has broad variation, photograph the worst areas under side light, remove loose dust without polishing through paper, and be honest about any water, paint, or material-history concerns. A contractor can assess a raw ceiling more easily than one covered by several improvised products.
Local finish expectations and authority links
EPF serves rooms with different access and lighting conditions across the western GTA. Oakville and Burlington open-plan homes often need careful daylight checks. Mississauga condos can combine strong window light with building logistics. Hamilton and Stoney Creek projects may include older repairs or connected ceiling sections. Grimsby renovations frequently benefit from sequencing ceiling correction before the final wall and trim paint.
For local scope, visit popcorn ceiling removal in Oakville, Burlington smooth-ceiling refinishing, Mississauga popcorn removal, Hamilton ceiling removal, Stoney Creek ceiling service, or Grimsby popcorn ceiling removal.
Contractor field note: mark defects before the first broad coat
Once a wet skim coat covers the ceiling, it is harder to remember which straight line was loose tape, which dark area was a stain, and which bump was a moving fastener. Diagnose and mark those causes first. Cosmetic flattening works best after adhesion, moisture, fastening, and tape problems are corrected—not as a substitute for them.
Photos and details to send for a quote
Send wide photos from the main doorway and opposite corner, plus low-angle photos that show the surface. Include close-ups of torn paper, gouges, seams, cracks, fastener marks, stains, old patches, and texture that would not release. Photograph every ceiling light, vent, fan, skylight, bulkhead, and crown moulding transition. Add room sizes, height, and whether the home is furnished.
Explain who removed the texture, whether it was painted, whether water was used, whether older material was tested, and which primers or compounds have already been applied. Mention planned pot lights, wall removal, painting, flooring, or cabinets so the finish is not damaged by later work.
Send those details through the EPF ceiling quote form. A useful scope should distinguish defect repair, full skim coating, sanding, primer, touch-ups, paint, protection, and cleanup.
Final recommendation
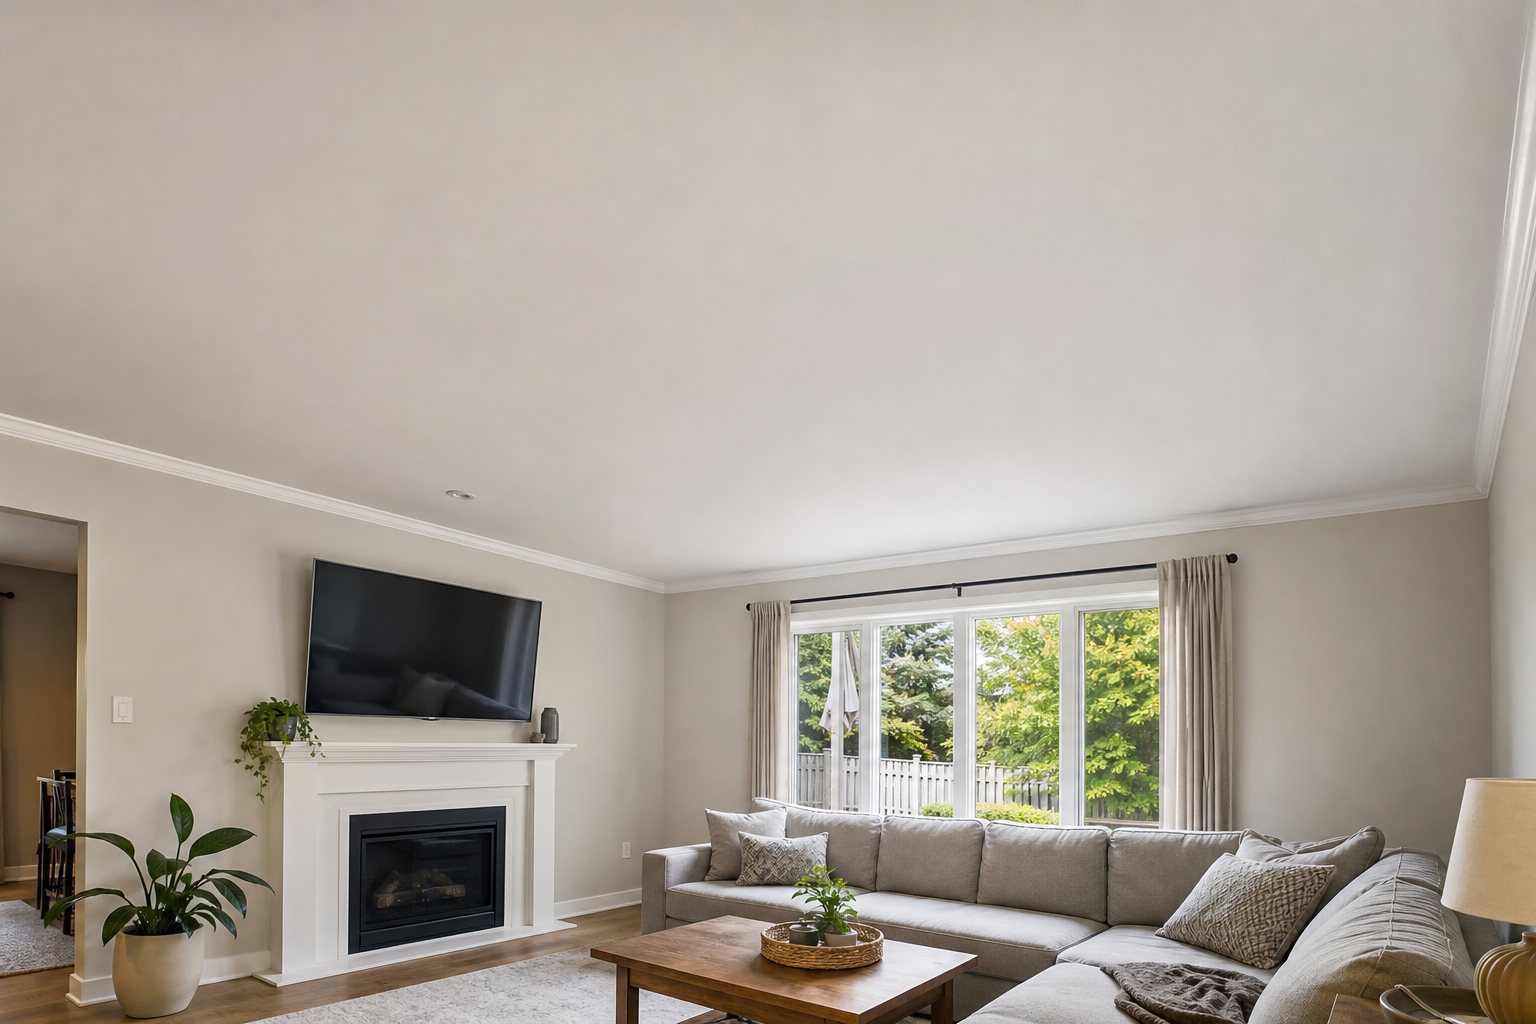
Do not judge an exposed ceiling by whether it looks rough before refinishing. Identify each defect, correct its cause, and choose spot work only when the remaining field is genuinely sound and flat. When seams, paper damage, patches, and waves cover the room, a controlled full skim usually creates a more uniform base. Inspect after primer and before final paint so imperfections are corrected at the right stage.
FAQ
Is it normal to see imperfections after removing a popcorn ceiling?
Yes. Texture often hides seams, patches, fasteners, torn paper, and an uneven original finish. Removal exposes the substrate that must be assessed before painting.
Can I paint directly over a scraped popcorn ceiling?
Only when it is sound, clean, uniformly smooth, repaired, and properly primed. Most scraped ceilings need at least some repair, and many benefit from broader skim coating.
How are gouges fixed after popcorn removal?
Loose edges are cleaned, deep damage is filled as needed, and the repair is feathered broadly. Torn paper may need sealing before water-based compound is applied.
Do visible drywall seams mean the whole ceiling needs a skim coat?
Not always. A few sound low seams may be corrected locally, but many joints or critical lighting can make a full-field skim more uniform.
Why did the ceiling look worse after primer?
Primer equalizes colour and porosity, making ridges, pinholes, scratches, and transitions easier to see. It should be treated as an inspection stage before finish paint.
Will flat ceiling paint hide waves and patch lines?
Flat paint reduces reflection but does not flatten the surface. Broad waves, proud joints, and narrow repair halos should be corrected before painting.
Related local pages and guides
Keep Planning Your Project
popcorn ceiling removal and smooth refinishing
Primary money page receiving authority.
why scraping alone does not create a smooth ceiling
Related removal-stage guide.
Level 4 versus Level 5 drywall finish
Related finish-standard guide.
water-damaged popcorn ceiling
Related diagnostic guide.
Stoney Creek popcorn ceiling removal
Priority local page.
Grimsby popcorn ceiling removal
Priority local page.
request a smooth-ceiling quote
Photo-based quote CTA.
Field Photos
What the Work Can Look Like
Article Review
AuthorAlex - EPF Pro Services
Reviewed byEPF Pro Services
UpdatedAugust 30, 2026
Ready to plan your ceilings?
Get a popcorn ceiling quote today
Share photos, ceiling heights, and timing. We reply the same day with Mississauga, Oakville, and GTA availability.
Quick next step