
Bathroom Drywall Materials: Plan the Wall Behind the Finish
Updated October 18, 2026
Choose the assembly and finish first, then the board. A practical guide to specifying bathroom walls without confusing moisture resistance with waterproofing.
- Trusted since 2005
- Fully insured
- Dust-controlled sanding
- Paint-ready finishing
- 3-year workmanship warranty
Quick Answer
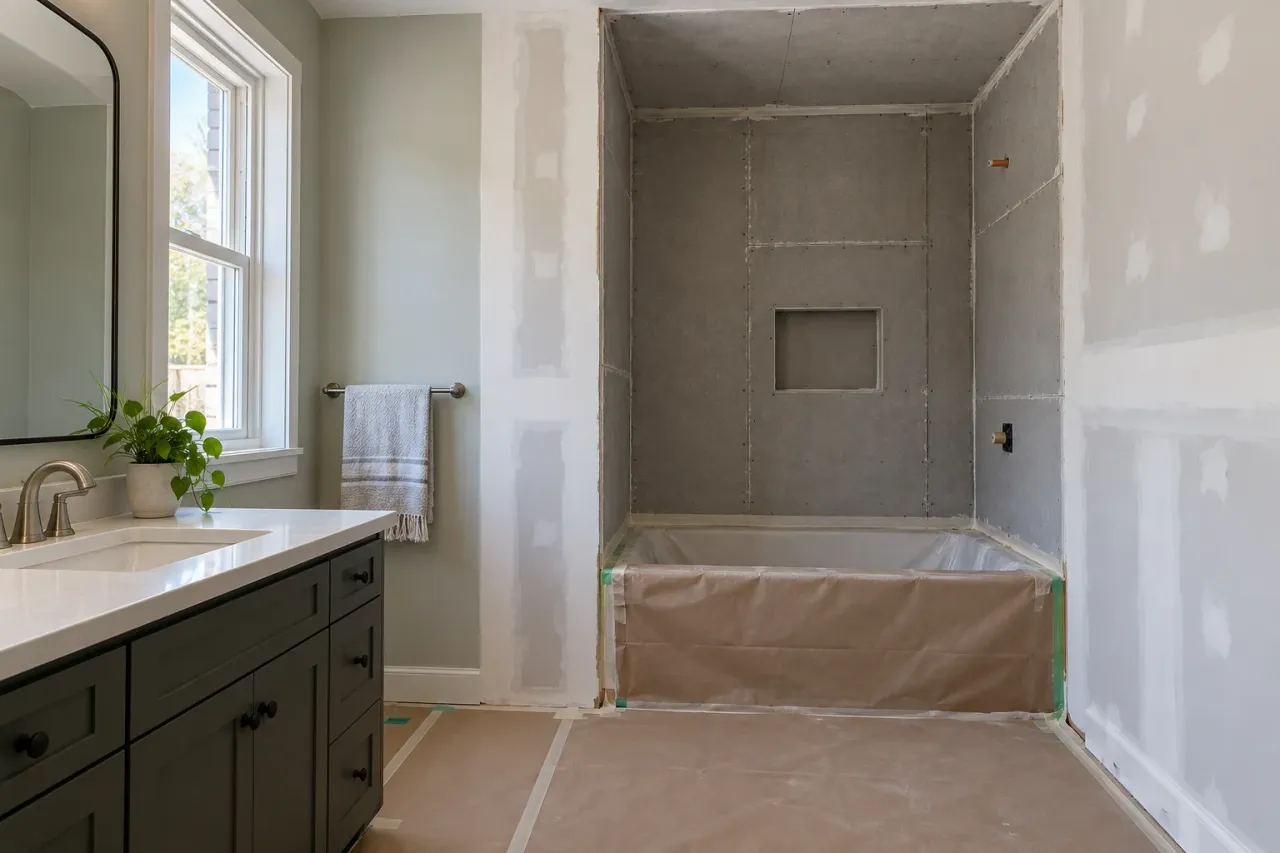
Select bathroom backing for the surface it will support. Painted walls, shower surrounds and ceilings can require different products and preparation. Confirm the complete shower system before buying its backing, retain suitable existing board where practical, and specify what each trade must deliver before the next stage starts.
Bathroom drywall materials should be selected from the finished surface backwards. Decide which walls will be painted, which will support tile, where direct water exposure occurs and what the shower installer requires. Only then choose the board and finishing products. A material described as moisture-resistant may suit one part of the room while being unsuitable as the complete solution in another.
EPF Pro Services approaches drywall installation and finishing as a coordinated part of the renovation. The goal is to give the next trade the surface it actually needs. That might mean a smooth primed wall, a correctly prepared backing accepted by a waterproofing installer, or a ceiling ready for its selected coating. Those are different deliverables, even in one small bathroom.
Make a surface schedule before a shopping list
| Surface | Decision to make | Information to record |
|---|---|---|
| Painted wall outside the shower | Retain, repair or install suitable board | Board condition, primer, finish paint and sheen |
| Tiled shower or tub surround | Select the complete approved assembly | Backing, waterproofing system and responsible installer |
| Ceiling | Assess board, joints and final coating | Support, damage, lighting and ventilation questions |
| Tile-to-paint edge | Coordinate the change in materials | Finished thickness, termination and preparation boundary |
A surface schedule can be a simple marked-up photograph. Name the wall beside the door, the vanity wall, the shower and the ceiling, then write the intended finish beside each. This prevents a general phrase such as finish the bathroom from hiding several different tasks. Share the same marked-up image with the drywall, plumbing, tile and painting trades so they are discussing the same boundaries.
Do not begin by assuming every surface needs replacement. Sound material outside the wet area may remain through a renovation. Equally, keeping every sheet simply because it is already installed can be false economy when the facing is badly damaged or the layout is changing. Establish what can stay before calculating material quantities or comparing labour totals.
What a board specification should tell you
A useful specification identifies the exact product, thickness and intended location. Colour is only a visual cue and may vary between manufacturers. Ask the installer to explain why the chosen product suits the application, how its edges and joints will be treated, and whether the next trade has accepted it. Keep that information with the quotation rather than relying on a verbal description at delivery.
The existing wall also matters. New material needs appropriate support and a sensible transition to retained surfaces. A different thickness can affect trim, fixture positions and the depth of the final wall face. Covering an old uneven surface with another layer may introduce new difficulties around doors or fittings. Ask how these edges will be resolved before accepting overboarding as an automatic shortcut.
Storage and handling are part of the job as well. Establish where sheets can be kept dry and protected without blocking the household's route. Large boards may not pass through a narrow stairwell or doorway intact. The installer can plan sheet sizes and joint positions around actual access, but that decision should be made with the finish in mind rather than after materials arrive.
Moisture resistance is not a complete shower design
For a painted wall in a bathroom, an appropriate moisture-resistant gypsum product can be useful. Its suitability still depends on the product instructions and the room conditions. It does not eliminate the need to investigate recurring dampness, and it does not turn a painted wall into a shower enclosure. The location and final assembly matter more than a reassuring word on the packaging.
For tiled wet areas, obtain the shower-system specification first. Schluter's waterproofing overview explains that common cementitious backers resist water but are not, on their own, a waterproof assembly. The installer must resolve the system's seams, penetrations and connections. This guide is about coordinating that decision, not providing a substitute installation detail.
Some systems approve gypsum beneath a membrane. For example, Schluter permits drywall beneath KERDI in its tiled shower system. That is a product-specific approval, not a rule for every membrane or every project. Have the responsible installer check current instructions and applicable requirements before ordering or finishing the backing.
Avoid accidental substitutions between trades
A substitution can happen without anyone intending to redesign the shower. One trade may supply a board it normally uses while another expects a particular backing. A finisher may prepare joints as though they will be painted, while the membrane installer needs a different preparation. Resolve these assumptions in a brief written handoff before the work reaches that stage.
Ask who approves a substitute if the specified material is unavailable. A product with a similar colour or description is not automatically equivalent within the selected assembly. Record any agreed change and its effect on preparation, warranty and timing. The homeowner does not need to become the designer, but should know which qualified installer owns the decision.
Retained drywall needs a condition check
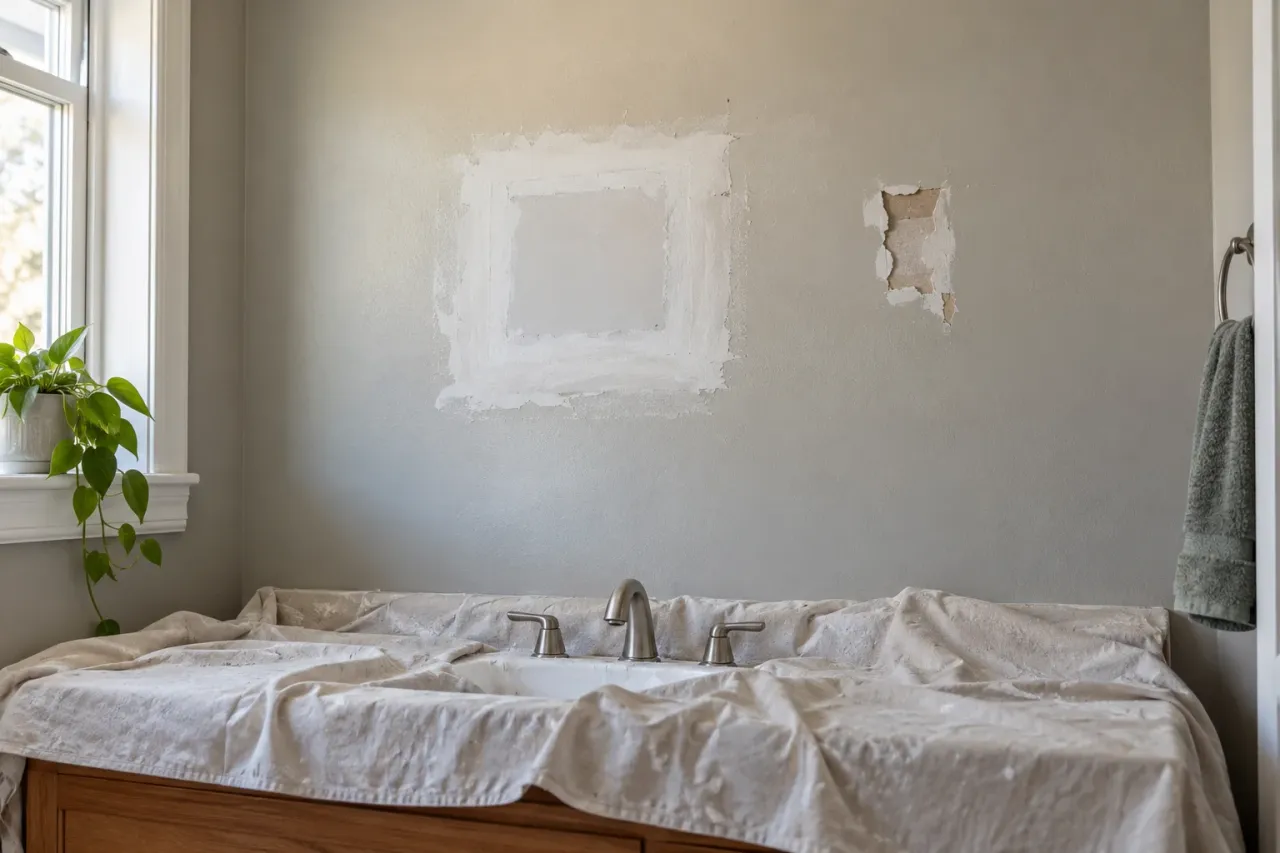
Look beyond the size of the visible mark. Small fixing holes in a sound painted wall differ from torn facing across a mirror area. A stain may reflect an old problem or an unresolved one. Board that has lost strength cannot become a reliable backing simply because the face is coated. The repair boundary should follow sound material and support rather than the outline of a cosmetic blemish.
For localized work, drywall repair services may be more appropriate than replacing the room. Ask whether the proposed repair includes the affected facing, adjacent loose finishes and the full area needed to blend the surface. A patch's visible centre is often smaller than the finishing area around it, especially beside light that runs across the wall.
Our bathroom repair-or-replacement guide considers that decision in more detail. Treat its planning examples as questions for your own room rather than evidence that every bathroom has the same conditions. If several repairs meet at an awkward edge, compare the finished result and total labour of patching with a coherent replacement section.
Plan framing, fixtures and access before enclosure
The wall face is the last opportunity to see what lies behind it. Finalize the positions of the vanity, mirror, cabinet, accessories and any equipment requiring support before boarding. A drawing with dimensions is more useful than saying approximately here. Give the relevant trades the actual product requirements so the support and openings are planned for the items being installed.
Work inside the cavity must be complete and ready for enclosure. Confirm this with the responsible plumbing, electrical or other trade, including any required checks. Keep useful photographs and agreed access-panel locations in the project record. A new smooth wall should not have to be opened immediately because a connection or valve was overlooked during the handoff.
Do not alter a wall assembly simply to make a cabinet fit. Where a wall or ceiling has particular performance requirements, its design needs to be understood before layers or openings change. The qualified professional responsible for the project should resolve those requirements. Drywall finishing follows that decision; joint compound cannot compensate for an unsuitable assembly behind it.
Keep tile edges and painted surfaces on the same plan
A neat transition depends on more than an attractive metal tile edge. The board plane, waterproofing build-up, adhesive and tile can affect the final meeting point. Agree where the tile stops and which surface the drywaller should finish. Otherwise the painted wall may be completed too far into the tile area or left with too little room to make a smooth connection.
The edge beside a glass enclosure is especially worth discussing before installation. Attachment requirements and the waterproofing detail belong to the selected system and installer. The drywall scope should recognize those decisions without inventing its own solution. Ask how an adjustment will be handled if the final enclosure differs from the item originally planned.
A retained wall may not be perfectly flat or aligned with new work. Decide whether that variation will remain, be corrected locally or require a broader adjustment. Small changes can become visible where a straight tile line meets paint. Looking at the transition before finishing is more useful than trying to hide it with extra paint at the end.
Specify painted-wall quality separately from moisture control
A painted bathroom wall needs a consistent surface under its intended lighting. Wide feathering, sound edges, clean sanding and appropriate primer all contribute. A mirror light close to the wall can reveal a ridge that was difficult to see under a temporary ceiling lamp. Discuss the final light fixtures and sheen before selecting the finishing scope.
A higher finish level addresses appearance; it is not waterproofing. Broader skim coating may help a demanding painted surface, but it should be recommended for a stated reason. Avoid adding it indiscriminately to every surface, especially where another installer has specified preparation for a membrane or tile. The finish should suit the next material, not merely sound like an upgrade.
If a repair outline remains visible, identify whether the issue is shape, texture or absorption. Our guide to patches showing through paint explains why these problems need different responses. Repeated finish coats are not a reliable way to flatten a raised edge. Make the surface correction before asking the paint to provide a uniform appearance.
Include the ceiling in the material discussion
The ceiling can be overlooked while attention goes to tile and cabinets. Identify its existing material, support, coating condition and any fan or light openings that will change. A painted ceiling with loose tape needs a different scope from one with isolated coating failure. A damaged area near a fixture should be assessed before deciding whether the board can remain.
Confirm that the chosen board and installation method suit ceiling use in the actual assembly. Do not assume a wall-board selection can be transferred overhead without checking its requirements. A steam enclosure is also a different design problem from an ordinary bathroom. Ask the responsible installer to specify the system instead of treating extra paint as the answer to a more demanding exposure.
Plan ceiling paint with the room's conditions and manufacturer guidance in mind. A low-sheen appearance may be desirable, but the exact coating should be suitable for the application. Agree whether the entire ceiling will be painted after repairs. A small touched-up area may look different from the existing surface even when the repair itself has been prepared correctly.
Compare complete scopes rather than material prices
Ask how small returns and concealed edges will be finished. The narrow strip behind a door, the wall beside a vanity cabinet and the underside of a bulkhead still need an agreed endpoint. If cabinetry will cover an area, confirm when it arrives and whether the painter needs access first. A surface hidden by a removable mirror may still require finishing because the mirror could change later. Mark these boundaries on the room photographs so the scope is understandable without standing in the bathroom together.
The price of a sheet is only one part of the project. Protection, delivery, cutting, support preparation, joint treatment, drying intervals, sanding and cleanup all affect the finished cost. A small room with many returns and penetrations can involve substantial detail work. Ask for the included end condition rather than judging the job by board area alone.
Break the estimate into meaningful responsibilities: removal where included, new backing, painted-area finishing, primer, paint and the handoff to waterproofing. Identify tasks supplied by other trades. If one quote ends at installed board and another includes painted surfaces, the totals do not describe the same result. Clarifying that difference is more useful than asking both contractors to match a number.
Keep a written approach to discoveries after opening the wall. Agree how the contractor will show the condition, explain the revised boundary and price extra work before proceeding. An allowance is not a guarantee that hidden work will be unnecessary. It should make uncertainty visible so you can make a decision with the relevant information rather than approve an unexplained change later.
Finish the plan with an acceptance checklist
Before booking, identify the person who accepts each surface for the next stage. After boarding, the relevant installer should check the backing and boundaries. Before painting, review the prepared wall under representative lighting. At completion, confirm the agreed repaint limits, cleaned work area and any remaining responsibility of another trade. This sequence prevents one final walkthrough from carrying every unresolved decision.
Record product names and keep useful instructions, photographs and finish information together. If a surface needs attention later, knowing what was installed is better than relying on memory of its colour. The record should describe the actual room, including agreed substitutions. It can be short and practical; it does not need to become an elaborate renovation report.
For city-wide project planning, our Mississauga bathroom renovation sequence shows how these decisions fit into a complete scope. When you are ready to price your own installation or repairs, request an EPF bathroom drywall quote with room photos, dimensions, intended finishes and the information already confirmed by the other trades.
FAQ
Is green board enough for a shower?
Do not specify a shower from board colour. Choose the complete approved shower assembly and have its installer confirm the backing and preparation. Moisture-resistant board alone is not a waterproof shower.
Can I retain ordinary drywall outside the shower?
Sound existing material may be retained where suitable for the planned use and finish. Its condition and the project requirements should be assessed rather than replacing or keeping it automatically.
Who should choose the shower backing?
The responsible shower-system installer should confirm compatible backing and preparation before it is installed. The drywall quotation should record that specification and the handoff boundary.
Does Level 5 finishing improve waterproofing?
No. It addresses painted-surface appearance. Moisture control, suitable materials and the shower assembly remain separate requirements.
What should I send for a bathroom drywall estimate?
Send wide photos, close-ups of damage, room dimensions, fixture changes and the intended finish for each surface. Include the selected shower-system information and known access restrictions.
Drywall service pages and guides
Plan the Right Drywall Service Next
Drywall installation and finishing
Plan the backing, repairs and finish for your renovation.
Keep, repair or replace bathroom drywall
Assess existing walls before specifying new material.
Plan a Mississauga bathroom renovation
Sequence fixture decisions, installation and finishing.
Burlington bathroom ceiling repairs
Identify paint, tape and board problems before refinishing.
Rebuild bathroom drywall in Grimsby
Plan the handoff from leak-related work to reinstatement.
Toronto condo bathroom planning
Coordinate building access, trades and finishing visits.
Field Photos
Bathroom planning illustrations
Article Review
AuthorEPF Pro Services
Reviewed byEPF Pro Services
UpdatedOctober 18, 2026
Plan your drywall scope
Get a drywall quote today
Share photos, room sizes, and timing. We reply the same day with GTA drywall availability and a clearer written scope.
Quick next step